Creating Documents in HireHop – Documents as PDF and printing

Event Hire Software quote documentsHireHop has a very powerful document engine, and even though it is powerful, it is very easy to use and enables you to make amazing looking documents.

Documents are all standard HTML documents, and fully support CSS and JavaScript, even when HireHop converts them to a PDF.

There are numerous standard templates available, and every template can be customised when you are a paying HireHop subscriber.

Document Types

A document will only be available in certain places and in certain circumstances within HireHop, for example a Job Quote document will only appear when you are in a job, and not when in Stock Management or a Project.  Another example is a job invoice document that will only appear when an authorised invoice is selected in the job’s Billing tab.  If the invoice is not authorised, the invoice document will not appear.

Document Templates

In Settings->Documents, you can add a new template document.  All template documents have a padlock on the line, so when you edit one, it creates a copy as new document.  Template documents (the ones with padlocks) are fine to delete as you can always easily add them again.  Documents without the padlock icon are custom documents and cannot be retrieved once you delete them, so it is advised to keep backups.

Editing a Document

HireHop does have an inbuilt HTML editor, however this is very basic and it is recommended to use the “Source” view as much as possible.

HireHop documents have merge fields which are prefilled by HireHop when you print or email a document.  The list of fields and explanation on how to use them can be found at https://myhirehop.com/modules/docmaker/fields.php.

Interfacing With The API

Instead or as well as using merege fields in a document, documents in HireHop can also talk with the HireHop API, and already has the appropriate cookies set.  Please note that this will not work for shared link documents due to security reasons.  HireHop documents can also communicate with third party APIs and even load JavaScript frameworks.

As an example of a document getting its data using the API, copy the code from the document at https://myhirehop.com/docs/job_info.html, and paste it into a job document.  The output is not very interesting, it is just a dump of data received from the server using the API.

You can also post data in a document, which is what the signature request document does.  Another example is that when you print or email a quote document, adding the following code into the quote document will automatically create an archive.

<script>
	// Save the supplying list as a quote once the document has finished loading
	window.onload = function() {
		var http = new XMLHttpRequest(),
		    job_id = document.getElementById("number").textContent,
		    now_str = (new Date()).toLocaleDateString(),
		    params = "job=" + job_id + "&desc=" + encodeURIComponent("Quote sent - " + now_str);
		http.open("POST", "/php_functions/archive_insert.php");
		http.setRequestHeader("Content-type", "application/x-www-form-urlencoded");
		http.send(params);
	}
</script>

Documents as PDFs

HireHop uses two engines to render documents as PDFs, being Chromium, which is used by Google Crome and Microsoft Edge browsers to render web pages on your computer, or WebKit which is the base for Apple Safari.  WebKit is far older and not maintained anymore, and does not support HTML5 as well as Chromium, however it is a lot faster when creating PDF documents due to its simplicity.

Document Stationery

When printing or emailing PDF documents with HireHop, you can add stationery for the document to be overlaid onto.  Stationery is uploaded as PDF files in Depot Management, and is applicable to each depot (including virtual depots).

The stationery pages get added to each applicable page of a document, and the last stationery page is then repeated for all remaining document pages.  As an example, with a one page stationery document, it will be placed behind every page of the document.  If the stationery is a two page PDF, the first page of the stationery will appear behind page one of the document, and the second page behind page two, and then any other subsequent document page.

 

How webhooks work in HireHop

HireHop can send a message with data to other apps when certain events are triggered within HireHop.  This message is called a webhook which automatically pushes the relevant data to the required location.

WebhooksWhat is a webhook?

A webhook sends/pushes a message, with data attached to the message, when specific things happen in HireHop (an event).  Webhooks are sent via HTTP (calls a web address) and are a way of pushing data to other applications in real-time.  Webhooks deliver the relevant data to specific applications as it happens, meaning the receiving application gets data immediately after the event happens, which is far more efficient and faster than polling for data changes..

HireHop webhooks can be used to communicate directly with other apps or be sent to a connector like Zapier, that can be made to format the data and make any necessary API calls back to HireHop or to another application.

Setting up a webhook

In HireHop, go to “Settings” then click the “Company settings” tab and the “Webhooks” button at the top of the page.  In the popup window, click on the “New” button and add the URL where the webhook message is to be sent to and select every webhook that you want the URL to respond to.  You can add as many webhooks as you want, but should limit them to only the necessary ones that the specific URL will respond to.

A HireHop webhook will POST data to your URL endpoint as JSON, and will contain the following or similar data.

{
    "time": "2022-03-29 07:50:42",
    "user_id": 1,
    "user_name": "John Smith",
    "user_email": "john@email.com",
    "company_id": 1,
    "export_key": "22u43mrjwe7u",
    "event": "invoice.status.updated",
    "data": { ... },
    "changes": {
        "FIELD_NAME": {
            "from": "old",
            "to": "new"
        }, ...
    }
}

In the above JSON example, the following fields are:

  • time” is the UTC time and date the webhook was sent.
  • user_id” is the ID of the user who caused the event to be triggered.
  • user_name” is their user’s name.
  • company_id” field is the unique number identifier of the company the user works for.
  • export_key” is the value of the export key in company settings which can be used as a security check.
  • event” is the name of the webhook event that was triggered.
  • data” is the data that appertains to the webhook event.
  • changes” are the fields that changed, being what they were to what they got changed to.

HireHop will not wait for a response from the called URL or report an HTTP error from calling it.

Example PHP code for a URL endpoint to capture the webhook data would be:

<?php
	// Read the JSON data
	$postdata = file_get_contents('php://input');
	// Convert JSON data to an object
	$data_str = json_decode($postdata);
?>


Posted in API

HireHop Rest API – Getting Started Guide

HireHop is built on top of an API, meaning anything you see HireHop do, you can also accomplish using the extensive API.  All you need to access the Rest API is a user token applied as a GET or POST to the relevant URL endpoint.

API Tokens

To generate an API token, go to the “Settings” page and select the “Users” tab.  Select or create a user, then while that specific user is selected, click the “Menu” button then the “API token” option to generate a token.  The token will then display and can be copied to the clipboard using the copy button.

The token will become invalid if you change the email or password of the selected user, or you subsequently login to that user.  To prevent this from happening, you should create a dedicated API user, and for security give it the relevant permissions, thus restricting it from anything you will not be using the API for.

For security reasons, you should never use the token in front end JavaScript code, it should only be used server side, as if a hacker obtains the token, they can change and access your data on HireHop, so keep your token a secret.  If your token does get leaked, just change the password of the API user and generate a new token.

Using A Token

A token should be set as a GET or POST parameter that is called “token”.  For example, to load job data for job number 52, HireHop will call the API endpoint:

https://myhirehop.com/php_functions/job_refresh.php?job=52

If you want to call the same endpoint using a token, the URL would be:

https://myhirehop.com/php_functions/job_refresh.php?job=52&token=dqwejk5GVT65909bHHBN7922pq5hxjm%207hmn

Remember that when passing the token via GET (a URL parameter like above), you must encode the token first using a tool like https://meyerweb.com/eric/tools/dencoder.

Posting Data

To create or edit data in HireHop you must use a POST. When posting data, you should set only the fields that you want to change, for example to create or edit a job using the endpoint https://myhirehop.com/php_functions/job_save.php, setting the parameter “job” to “0” or omitting it will create a new job, anything else will edit the relevant job number.  So to edit the company name in job number 52, the post data should be:

{
"job" : 52,
"name" : "New Name",
"token" : "dqwejk5GVT65909bHHBN7922pq5hxjm=-7hmn"
}

API Endpoints

Many API endpoints are documented in the API documentation, with many more to follow.  To establish the endpoint for a task, in the HireHop application, use the browser network console to inspect the network calls and what parameters are set.  An extensive guide to the URL endpoints will be published soon.

Rate Limits

HireHop allows each user 60 connection requests within a 1 minute period.  If there are more than 60, a “Security warning, too many transactions” (327) error is returned.

Posted in API

Cross Domain Fonts – CORS font-face not loading

Many users have created some amazing documents for use in HireHop, utilising HTML5, JavaScript and CSS functionality.  For these documents users sometimes need a special font that they store on their server, however, sometimes the font doesn’t seem to work in the HireHop document.  The reason for this is because of Cross-Origin Resource Sharing (CORS) restrictions in browsers.

Fonts Not Loading in Documents

Most web browsers do not allow cross-domain requests, this is because of the same origin security policy. This means that sometimes when using web-fonts from another domain can cause errors and the font does not load in the browser, or in HireHop documents.

<style type="text/css">
@font-face {
    font-family: 'OpenSans';
    src: url('https://my_server.com/fonts/OpenSans.woff2') format('woff2');
}
html, body{
    font: normal 16px OpenSans, sans-serif;
}
</style>

The Solution

To fix cross-origin restrictions for your fonts, the response from remote server that hosts the font files must include the Access-Control-Allow-Origin header.

If you’re using font services like Typekit or Google Fonts, or maybe content delivery networks like BootstrapCDN, CdnJS or JsDelivr to load your prefered fonts, you don’t need to do anything, because the Access-Control-Allow-Origin header is already sent in their response header.

Apache

To configure an Apache web server, put the following code into the httpd.conf or .htaccess file.

  1. Add the mime type headers on Apache:
    AddType application/vnd.ms-fontobject    .eot
    AddType application/x-font-opentype      .otf
    AddType image/svg+xml                    .svg
    AddType application/x-font-ttf           .ttf
    AddType application/font-woff            .woff
    AddType application/font-woff2           .woff2
    
  2. Enable cross-origin resource sharing (CORS) on Apache for the mime types:
    <IfModule mod_headers.c>
      <FilesMatch ".(eot|otf|svg|ttf|woff2?)$">
        Header set Access-Control-Allow-Origin "*"
      </FilesMatch>
    </IfModule>
    

NGINX

To configure an NGINX web server, put the following code into the /etc/nginx/nginx.conf or your custom /etc/nginx/conf.d/custom.conf file.

  1. Add the mime type headers on NGINX:
    application/vnd.ms-fontobject    eot;
    application/x-font-opentype      otf;
    image/svg+xml                    svg;
    application/x-font-ttf           ttf;
    application/font-woff            woff;
    application/font-woff2           woff2;
    
  2. Enable cross-origin resource sharing (CORS) on NGINX for the mime types:
    location ~* .(eot|otf|svg|ttf|woff|woff2)$ {
        add_header Access-Control-Allow-Origin *;
    }
    

IIS

To configure the Microsoft IIS, add the following the code to the web.config system.webServer block.

  • Enable cross-origin resource sharing (CORS) on IIS
    <system.webServer>
      <httpProtocol>
        <customHeaders>
          <add name="access-control-allow-origin" value="*" />
          <add name="access-control-allow-headers" value="content-type" />
        </customHeaders>
      </httpProtocol>
    </system.webServer>
    

PHP

If you can’t change the server settings, you can always use PHP to deliver the font file.

  • Use a server script file rather than a physical font file
    <style type="text/css">
    @font-face {
        font-family: 'OpenSans';
        src: url('https://my_server.com/fonts/OpenSans.php') format('woff2');
    }
    html, body{
        font: normal 16px OpenSans, sans-serif;
    }
    </style>
    
  • How to fix cross-domain @font-face issues with PHP
    <?php
    // fonts.php
    header('Access-Control-Allow-Origin: *');
    header('Content-Type: application/font-woff2');
    echo @file_get_contents('/fonts/OpenSans.woff2');
    ?>
    
Posted in API

How To Setup HireHop With QuickBooks – HireHop Equipment Rental Software + QuickBooks

QuickBooks + HireHop integrationHow Do HireHop and QuickBooks Integrate?

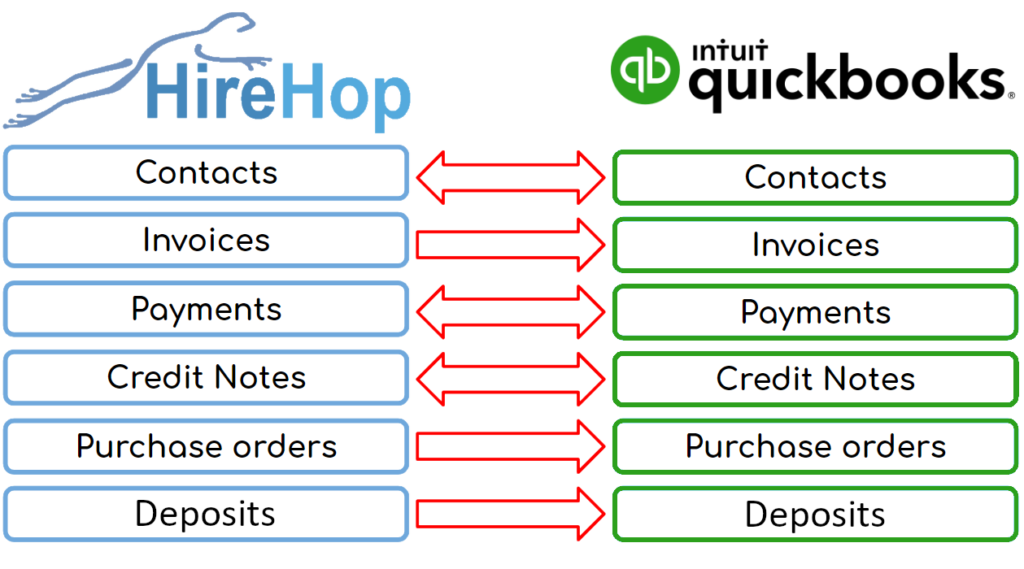
HireHop can produce your invoices, credit notes, payments and purchase orders.  HireHop also has an address book that contains customers and suppliers, as well as jobs where the customer is unique and not in the address book.  HireHop also keeps track of what has been paid and credited against invoices, as well as the balance of a customer’s account.

QuickBooks needs these invoices, credit notes, payments, purchases orders and contacts created in HireHop for bookkeeping purposes. With our integration working seamlessly behind the scenes, HireHop tells QuickBooks when they are created or updated so you don’t have to. In turn, HireHop needs to know what payments or credits have been applied in QuickBooks so that it can register invoices as being paid or not.

What Data Does HireHop Send To QuickBooks?

There are two modes to synchronise data between HireHop and QuickBooks – being live or buffered:

  • In live mode, as soon as you create or edit an invoice, credit note, payment, or purchase order, it is immediately sent to QuickBooks.
  • In buffered mode they are all kept in a buffer until such time you which to synchronise data between HireHop and QuickBooks.  Any invoice, credit note, purchase order or payment that fails to sync with QuickBooks in Live Mode will automatically be put into the buffer for a manual sync.  All buffered invoices and credits can be viewed in the Invoices to be Exported report.

HireHop invoices are sent to QuickBooks once the status has been changed to Approved or above.  If an Approved invoice is edited, it is re-sent to be updated in QuickBooks.  The same goes for Purchase Orders, Credit Notes and Payments.

All new contacts used in invoices and purchase orders are automatically sent to QuickBooks from HireHop.

In QuickBooks, an entry in the address book can’t be both a customer and supplier, therefore, as this feature is available in HireHop, when this happens, HireHop will create two entries in the QuickBooks address book, one for the customer address book, and one for the supplier address book.

Once you have synchronised or connected HireHop to QuickBooks, QuickBooks will authorise this connection for 3 months, after which time HireHop will prompt you to reconnect the next time a connection is needed.

What Data Does QuickBooks Send To HireHop?

Contacts are imported from QuickBooks into HireHop in Settings, enabling you to import only the contacts that you need so that your address book doesn’t become cluttered.

When a payment or credit note is applied to an invoice within QuickBooks, they are sent over to HireHop and registered to the corresponding invoice. The invoice status is then automatically marked as having been paid or not.


How To Setup QuickBooks With HireHop

Setup HireHop with QuickBooks
  • In HireHop Settings click the Accounts tab.
  • In the Accounts click the New button on the right of the Accounting Packages table at the bottom of the screen, and a new accounts package window will open.
  • Click the first option that is titled “Integrate with“, and select “QuickBooks“. You can then set prefixes and start numbers for invoices, credit notes and purchase orders. You can also choose to buffer transactions and sync them when you decide, instead of having live and automated updates. Click the Next button to move on.
  • The “Accounts” page enables you to enter nominal codes and banks accounts.  Click the Synchronise button and HireHop will import all bank accounts and nominal codes from your QuickBooks account.  You should delete all the ones you won’t use in HireHop (you can add them back later). There will be one bank account and two nominal codes in bold, these are your defaults that can be changed.  The defaults are the ones selected when you don’t assign a nominal to an item. Once finished, click Next.
  • The next page is your “Tax codes”, again click the Synchronise button and HireHop will import them from QuickBooks.  Again you can edit and change the defaults from the automatically set ones. Once finished, click Next.
  • Lastly is the “Contacts” page. You don’t have to import these, but if you do, you can match ones that are already in HireHop,  import others and delete the ones you won’t use.  Once finished click the Save button.

You will now see QuickBooks in the Accounting Packages table and some red flashing “Assign” buttons.  As HireHop can support multiple accounting packages in the same installation, different ones for individual depots or groups of depots, you have to set which depots use this version of QuickBooks.  Also HireHop has tax and nominal groups, again, these need to be assigned to QuickBooks ones.

  • Click the Assign button next to the “Accounting packages” table, click on the depot and select “QuickBooks” and then click the Save button.  If a depot is not set, it will use the default accounting package, if a virtual depot is not set, it will use the parent depot’s accounting package.
  • Click the Assign button next to the “Nominal groups” table, click on the QuickBooks row and each column to assign a nominal code to a nominal group. Once finished, click the Save button.  Any nominal group not set will resort to the default revenue or expense nominal code.
  • Lastly, click the Assign button next to the “Tax groups” table, click on the depot rows assigned to QuickBooks and click in each column to assign the appropriate Tax codes to the depot, and then click the Save button.

You have now setup QuickBooks and we are ready to go.


Find out more and try QuickBooks Accounting Software for free.

How To Setup HireHop With Xero – HireHop Equipment Rental Software + Xero Accounting

Xero Equipment Rental SoftwareHow Do HireHop and Xero Integrate?

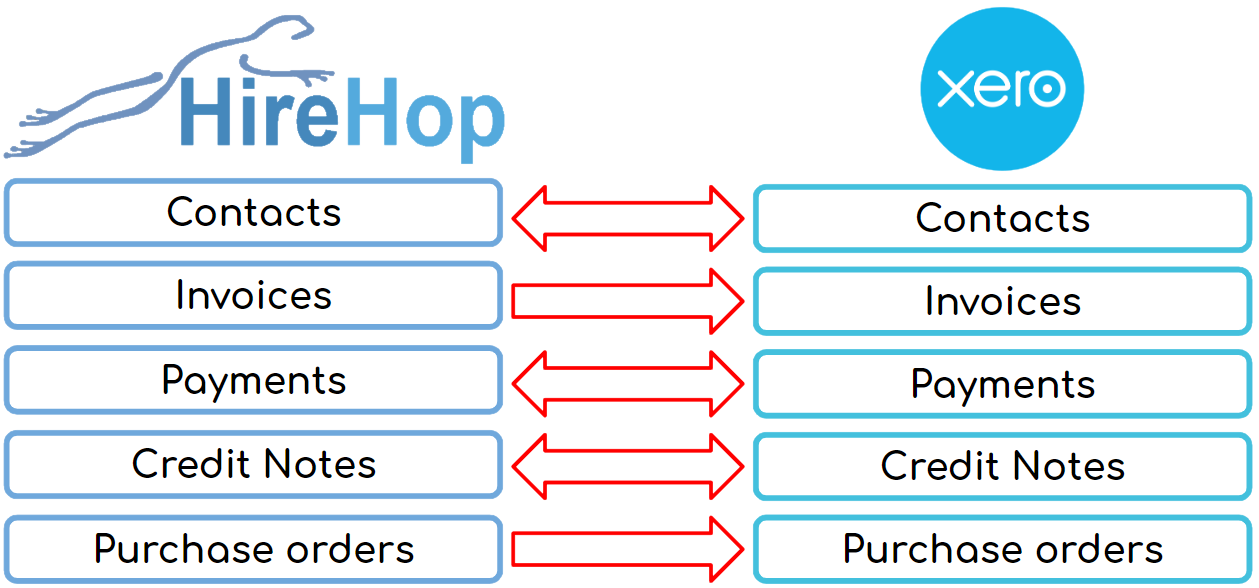
HireHop can produce your invoices, credit notes, payments and purchase orders.  HireHop also has an address book that contains customers and suppliers, as well as jobs where the customer is unique and not in the address book.  HireHop also keeps track of what has been paid and credited against invoices, as well as the balance of a customer’s account.

Xero accounting software needs these invoices, credit notes, payments, purchases orders and contacts created in HireHop for bookkeeping purposes. With our integration working seamlessly behind the scenes, HireHop tells Xero when they are created or updated so you don’t have to. In turn, HireHop needs to know what payments or credits have been applied in Xero so that it can register invoices as being paid or not.

What Data Does HireHop Send To Xero?

There are two modes to synchronise data between HireHop and Xero – being live or buffered:

  • In live mode, as soon as you create or edit an invoice, credit note, payment, or purchase order, it is immediately sent to Xero.
  • In buffered mode they are all kept in a buffer until such time you which to synchronise data between HireHop and Xero.  Any invoice, credit note, purchase order or payment that fails to sync with Xero in Live Mode will automatically be put into the buffer for a manual sync.

HireHop invoices are sent to Xero once the status has been changed to Approved or above.  If an Approved invoice is edited, it is re-sent to be updated in Xero.  The same goes for Purchase Orders, Credit Notes and Payments.

All new contacts used in invoices and purchase orders are automatically sent to Xero from HireHop.

What Data Does Xero Send To HireHop?

Contacts are imported from Xero into HireHop in Settings, enabling you to import only the contacts that you need so that your address book doesn’t become cluttered.

When a payment or credit note is applied to an invoice within Xero, they are sent over to HireHop and registered to the corresponding invoice. The invoice status is then automatically marked as having been paid or not.


How To Setup Xero With HireHop

Setup HireHop with Xero
  • In HireHop Settings click the Accounts tab.
  • In the Accounts click the New button on the right of the Accounting Packages table at the bottom of the screen, and a new accounts package window will open.
  • Click the first option that is titled “Integrate with“, and select “Xero“. You can then set prefixes and start numbers for invoices, credit notes and purchase orders. You can also choose to buffer transactions and sync them when you decide, instead of having live and automated updates. Click the Next button to move on.
  • The “Accounts” page enables you to enter nominal codes and banks accounts.  Click the Synchronise button and HireHop will import all bank accounts and nominal codes from your Xero account.  You should delete all the ones you won’t use in HireHop (you can add them back later). There will be one bank account and two nominal codes in bold, these are your defaults that can be changed.  The defaults are the ones selected when you don’t assign a nominal to an item. Once finished, click Next.
  • The next page is your “GST codes”, again click the Synchronise button and HireHop will import them from Xero.  Again you can edit and change the defaults from the automatically set ones. Once finished, click Next.
  • Lastly is the “Contacts” page. You don’t have to import these, but if you do, you can match ones that are already in HireHop,  import others and delete the ones you won’t use.  Once finished click the Save button.

You will now see Xero in the Accounting Packages table and some red flashing “Assign” buttons.  As HireHop can support multiple accounting packages in the same installation, different ones for individual depots or groups of depots, you have to set which depots use this version of Xero.  Also HireHop has tax and nominal groups, again, these need to be assigned to Xero ones.

  • Click the Assign button next to the “Accounting packages” table, click on the depot and select “Xero” and then click the Save button.  If a depot is not set, it will use the default accounting package, if a virtual depot is not set, it will use the parent depot’s accounting package.
  • Click the Assign button next to the “Nominal groups” table, click on the Xero row and each column to assign a nominal code to a nominal group. Once finished, click the Save button.  Any nominal group not set will resort to the default revenue or expense nominal code.
  • Lastly, click the Assign button next to the “GST groups” table, click on the depot rows assigned to Xero and click in each column to assign the appropriate GST codes to the depot, and then click the Save button.

You have now setup Xero and we are ready to go.


Find out more and try Xero Accounting Software for free.

Customisation & Customising Widgets – HireHop API NoHTML Framework

HireHop is completely customisable, you can even add custom fields, all done using the HireHop JavaScript injection method, in which JavaScript files that you have written are inserted into HireHop pages.  If you look at the page source of a HireHop page, you will see <!– PLUGINS –>, it is after here where the JavaScript for your plugins will be inserted.

HireHop has been built from the ground up, developing our own framework that we call NoHTML, amalgamating existing technology and methodology to produce a framework that is easy to use, extendable and enables fast page loading, even on slow internet connections.

Apart from the main part of the page, the main parts of HireHop are dynamically built on the client machine using JavaScript and jQuery widgets, similar to REACT and JSX, but more simple and of course using the familiar jQuery framework.  For instance, if you load a Job page and inspect the page (press F12 for the browser’s object inspector), you will see a <div> element at the bottom of the page structured like so:

<div id=”notes_tab“></div>

As you can see the above <div> is just an empty div element. If you click on the “Notes” tab, suddenly the above element is populated with elements.  Looking at your browser’s inspector you will also notice that the only data loaded from the server was some JSON and not the code in the notes tab.  The notes tab was built dynamically on the client machine using a custom jQuery UI Widget called $.notes() (internally called $.custom.notes) that is defined in the file /js/notes.js, and that widget used an ajax call to the server to get the data to populate it.

All the widget files on HireHop are compressed for speed, however to see the expanded source just add a .MAX to the end of the file’s name, for instance /js/notes.MAX.js.

To inject JavaScript into your webpages, if you go to Settings->Company Settings, and in Plugins add the url of your JavaScript file, which should be on an https server.  You can add multiple URLs which you can separate with a “;” (semi-colon).  All URLs must be to a secure https domain.

Extending A Widget

As these are jQuery UI Widgets, you can use a type of Object Orientated programming technique to overwrite parts of the HireHop widgets. For example, we are going to create a small plugin that adds a span element with the word Hello after the Refresh button on the notes widget.

First create a JavaScript file on your web server and add the following code

$(document).ready(function(){
// Check if the notes widget exists
if(typeof($.custom.notes)!=”undefined” && hh_api_version<=1) {
// Redefine notes widget
$.widget(“custom.notes“, $.custom.notes, {
_init_main: function() {
// Call the old _init_main
this._super(arguments);
// Add an hello after the refresh button
$(“<span>“,{ html:” Hello” }).insertAfter(this.btnRefresh);
},
// Even add your own new functions into the widget if you want

new_function_name: function() { }
});
}
});

The above code is available in a file located at https://s.myhirehop.com/plugins/demo.js.

Explaining the code above line by line:

$(document).ready(function(){
First we wait for the document to be ready and all page elements and JavaScript files to be loaded.  In this case this is not necessary as the /js/notes.js file is loaded before the plugin script, however for this example we have left it in for reference.

if(typeof($.custom.notes)!=”undefined” && hh_api_version<=1) {
Next we test to see if the notes widget has been defined, if it has we will proceed to overwrite one part of it.  Here we are also testing the HireHop API version the user is using.  As new versions of HireHop are released, the user will have the option to use it and this makes sure that your plugin is compatible with that version.

$.widget(“custom.notes“, $.custom.notes, {
Here we are initiating merging of a new JavaScript object containing functions into the notes widget.

_init_main: function() {
By naming a function the same as an existing one, it will be overwritten.

this._super(arguments);
This calls the inherited function, being the function we are overwriting.

$(“<span>”,{ html:” Hello” }).insertAfter(this.btnRefresh);
We then add a simple span element containing the word “Hello” after the Refresh button. you could also use $(“<span> Hello</span>”).insertAfter(this.btnRefresh);. To address elements, you should always use the variables assigned to elements and never the element ID’s as most ID’s on HireHop are dynamically created and will be different with every instance.  If the element ID has numbers in it or is not nicely named, definitely don’t use it.

new_function_name: function() { }
Finally, this does nothing and is not necessary for what we need to do, it just demonstrates that you can even add your own functions into the widget.

When you reload the HireHop page, you will see the word Hello after the refresh button if you did everything correctly.

Versioning

A huge advantage of using the HireHop NoHTML framework is that all the JavaScript is cached, resulting in fast page loading as the browser uses the JavaScript files in its cache.  This can be problematic when you update your plugin, as all the users using it, their browsers won’t download the updated version, and instead use their cached version, that is unless they clear their browser cache.

To overcome this, when adding your JavaScript URLs to the Plugins options, you can use a versioning parameter, for example for https://www.mywebsite.com/plugin.js you would enter it as https://www.mywebsite.com/plugin.js?v=1. After an update you can then change it to read https://www.mywebsite.com/plugin.js?v=2 which will force all browsers to reload the JavaScript file from your server.

Working Demo

If you add the path https://myhirehop.com/plugins/title_bar.js into your plugins in “Settings->Company settings”, you will see this adds a a small box in the top right on job pages and enables users with permission to do so to switch depots with a drop down in the top right of the screen.  If you look at the source code, you can see how this basic plugin works.

Please note, plugins will not load in the settings page for security reasons and will only load if you have a paid subscription.

Posted in API

Custom Fields – HireHop API

You can have an unlimited number of custom fields in HireHop specific to each record, a record being a job, project, test/service, asset, etc.  All custom fields can be used in documents, as long as they exist, otherwise they will just be blank.

Currently custom fields are only fully supported in Jobs and Projects. Custom fields can only be used using plugins.

Custom Fields Structure

When fetching a custom field for the currently edited record, there is a function called _get_custom_field_value(field) which will return NULL if the field is not set, a string, or a JavaScript object, depending on how you saved it.

You probably should save custom fields as a JavaScript object (like JSON) in the following format for more printing control, as if it is just a string, HireHop will treat it as a string:

"field_name" :
{
"value"  : "The value of the field",
"type"   : "The field type, default is text, it can also be number, currency, text, date, html and array"
"format" : "For date type only, eg "ddd, dddddd tt" // = "Mon, 1 January 2017 12:00"
}

  • value is the value of the field in any format.
  • type tells HireHop how the field should be treated when merging it into a document. An array field will be displayed as JSON.
  • format tells HireHop how to format the field in the document, currently only available dates and is dependent on the users settings and how their date and time formats are set:
    • dddddd for a long date (like 1 January 2018)
    • ddddd for a short date (like 01/01/2018)
    • dddd for the day of the week (like Monday)
    • ddd for the short day of the week (like Mon)
    • tt for the time (like 12:36 am).

The format part is only needed for dates and if it is not set, nothing will show.  You can merge formats together and add separators, for instance you can use dddd, dddddd tt which will give “Monday, January 1 2018 12:00” if the user has set a date order as day month year. The value for a date type must be stored in the yyyy-mm-dd hh:mm format.

If you just save the field as a string and not a JavaScript object, that’s fine, HireHop will just treat it as a string.  Saving your custom fields as a JavaScript object will give you greater control, especially when HireHop prints them in a document.

Saving The Custom Fields

On all edit forms that support custom fields, there is a function called _save_custom_field_value(field, value).  This stores your fields to be saved later.  If you can’t find the function, please contact us.

Please note, that all changes must be written prior to saving.

When the custom fields are saved, they are merged with the existing fields, and any new fields passed with the same name as any existing ones, the new values will be set.

When saving the custom fields, for example using /php_functions.job_save.php directly as an API call, only parameters set will be updated, so if you only set the custom_fields post parameter, only the custom fields will change, all the other fields will stay as is.

Printing Custom Fields

All custom fields can be incorporated into documents just like normal fields and are prefixed with a single “_” (underscore) character.  For example, for a custom field in a job called “field_name”, you would load it by using the merge field “job:_field_name“.

Naming Custom Fields

Some custom fields in documents merge fields together, for example tests merge with an asset in some document fields, so be careful not to use the same field name in an asset and a test.  Also, other plugins maybe added in the future written by yourself or from another source, so add a prefix that denominates you, for example plugins written HireHop by use the “hh_” prefix, so a field written in a plugin by us might be called “hh_NewName”.  Field names in document merges are not case sensitive, but they obviously are in JavaScript.

Searchable Custom Field

There is an additional field called CUSTOM_INDEX, that can be used for searching, filtering and listed in search results.  The field is a 45 character string value that can be set to NULL. To enable the field to be shown in the search results on the home page, change the allSearchCols global JavaScript variable by adding CUSTOM_INDEX to it:

if(allSearchCols.constructor===Array && doc_type==0 ) {
allSearchCols.push("CUSTOM_INDEX");
}

There is also a language setting for the custom field displayed name:

if(typeof(lang["customIndexTxt"])=="undefined" || lang["customIndexTxt"]=="") {
lang["customIndexTxt"] = "Custom field name";
}

The reason for the testing for undefined or blank above is just in case the user has set it in the language.

You can use the custom searchable field in the page by adding a lookup in the page or the editor.  On jobs there is a hidden tile that displays the  CUSTOM_INDEX field and can be shown and utilised like so in a plugin:

$("#job_tile_custom_index")
.show()
.click(function() {
window.open("https://www.my_external_app.com?id="+job_data["CUSTOM_INDEX"],"newwindow");
});

To save the CUSTOM_INDEX field in the relevant edit widget, using a custom plugin you can add a form element into the edit widget, for example like so:

// This adds the CUSTOM_INDEX field into the job edit widget
if(typeof($.custom.job_edit)!="undefined") {
// Redefine job_edit, move name to after telephone
$.widget("custom.job_edit", $.custom.job_edit, {
_init_main: function() {
// Call the old _init_main
this._super(arguments);
// Add an extra edit in the job edit
var table = this.default_disc.closest("table");
var tr = $("<tr>").appendTo( table);
$("<td>", { html: lang.customIndexTxt+ " :" }).appendTo(tr);
$("<input>", {
"name" : "custom_index", // Parameter to pass when saving
"class" : "data_cell",   // Setting class to data_cell tells HireHop it is a standard data field
"data-field" : "CUSTOM_INDEX", // Name of the field
"maxlength" : 45         // The CUSTOM_INDEX has a maximum length of 45 characters
})
.appendTo( $("<td>").appendTo(tr) );
// Change the memo height to compensate
this.job_edit_memo.height(110);
}
});
}

The CUSTOM_INDEX field is called xxx:custom_index in the document and is passed as a string into the document.

Global Custom Fields

Occasionally you might want to store a global counter, etc. for the whole company.  To read and store global custom fields use /php_functions/custom_fields_global_load.php and /php_functions/custom_fields_global_save.php.  Saving the data, you need to pass either a json string or json array:

$("#saving_dialog").dialog("open");
// This adds the CUSTOM_INDEX field into the job edit widget
$.ajax({
url: "/php_functions/custom_fields_global_save.php",
type: "post",
dataType: "json",
data: {
"fields":{"my_field":"any type of value"}
// or a json string
// "field":'{"my_field":"any type of value"}'
},
success: function(data)
{
$("#saving_dialog").dialog("close");
// HireHop reported an error
if(typeof(data.error) !== "undefined")
error_message(isNaN(parseInt(data.error)) ? data.error : lang.error[data.error]);
else
{
// All good, "data" is a javascript object (JSON) of all global custom fields
}
},
// Handle an http error
error: function(jqXHR, textStatus, errorThrown)
{
$("#saving_dialog").dialog("close");
error_message(lang.error[1]+" ("+errorThrown+").");
}
});

Custom Fields in the Settings Page

These fields use the same storage as the standard custom fields in HireHop. For example, if you setup a custom field for jobs in Settings called “testing”, give it a value on a few jobs, even after deleting the custom field in Settings, the field can still be used above and visa-versa. The custom fields builder in Settings is a way to add custom fields without programming anything.

Posted in API

Feed Stock Data to Your Website

Synchronise with the cloud

HireHop allows you to seamlessly feed stock data to your website; enabling you to list hire and rental stock on your website, with images and other data, that is synchronised with the HireHop equipment rental software’s database.

You can filter the lists (or not) by category or name, as well as sort them by name, price, weight or stock quantity held. You can also choose what format you want the export in, albeit JSON, CSV or XML

This feature can also be used to export your hire stock data easily, enabling you to export filtered parts of your data or all of it at once, the choice is yours.

How to Get a List

Before you export a list, you must first create an export key. This key is like a password that must be passed to get the list.  If you change the export key, any requests made not using the new export key, will be denied.

To get the export, you need a link, this you can get from the Hire Stock Management page.  By clicking on Menu and then Get data link, a box will appear with a link to get a list for the current filtered view.  To get the export link, you must be authorised to get it in the user permissions.

If you apply any filtering in the Hire Stock Management page, this filter will be the data the generated link will produce.  So for example, if you select a category and then get a data link, the data produced by the link will be all the stock in that category, just as it is listed on the page.

The data returned by HireHop includes the name, an image link, quantity, category, weight, dimensions, prices, part number, etc.

Technical

https://s.myhirehop.com/modules/stock/stock_export.php?id=10&key=abc1234def&depot=1&cat=0&sidx=TITLE&sord=asc&format=xml

The generated link will look something like above, and as you can see, it has various parameters that are explained below:

Parameter Meaning
id This is a unique ID for your company.
key The generated export key.
depot An identifier for a depot (zero means all depots), to get the quantity.
cat The identifier for a category
cat_name The name of a category
name The name search
del If set to one, deleted items will be listed
unq A unique ID of an item. If set, only one item will be returned.
sidx The column to sort by
sord The sort order; asc = ascending & desc = descending
format The format the data will be returned in, being XML, CSV or JSON (default)

To load the data into your web page, you can Ajax it using JSONP, for example, with JQuery:

$.ajax({
    url: "https://s.myhirehop.com/modules/stock/stock_export.php?id=10&key=abc1234def",
    dataType: "jsonp",
    success: function( data ) {
        console.log( data );
    }
});

Please note, the service, pat test and test intervals are in ISO 8601 period formats and all dimensions and weights are metric.